

Custom Patch Artwork Requirements: Can You Use a Photo or Drawing?
Direct Answer: Yes — you can use a photo or drawing for a custom patch. Photos work best on sublimated patches that reproduce fine detail, while drawings act as blueprints for embroidery. For sharp results, send vector files (AI, EPS, PDF) or high-resolution images at 300 DPI, and simplify small text or gradients before production.
Last week a customer sent me a family photo to turn into an embroidered patch.
Lovely picture. But stitched at three inches wide, every face would have blurred into a smudge.
That gap — between how a picture looks on screen and how it behaves on fabric — is what these artwork rules are about.
Most people learn it the hard way, when a bad sample lands on the desk. You do not have to.
I am William Anderson, and here is what we see every day on the factory floor at Patch Specialist when it comes to custom patch artwork requirements.
Can I Use Any Photo or Drawing?
Short version: yes, but the patch type decides everything.
Here is the idea that saves the most reorders. One file, three outcomes.
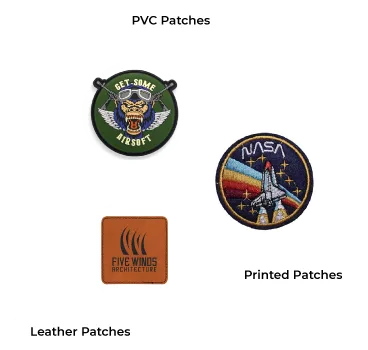
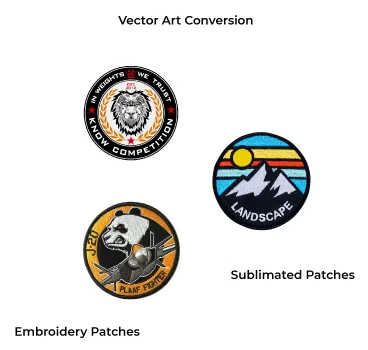
The same logo can look brilliant woven, muddy embroidered, and picture-perfect sublimated. The artwork did not change — the process did.
So the real question is never "can I use this photo?" It is "which patch type suits it?" Get that pairing right and the rest falls into place.
Photo vs. Drawing: What Works
Most guides lump these together. They behave very differently under a needle.
Using a Photo
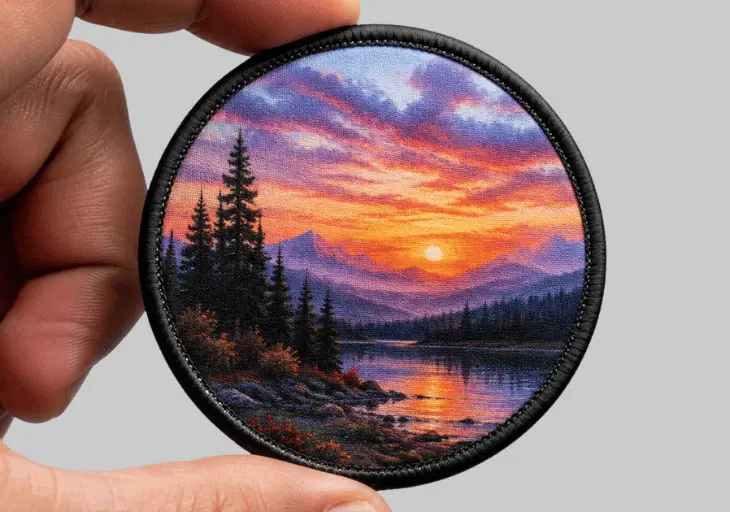
A photo is packed with gradients, shadows, and fine tonal detail.
That makes it a natural fit for sublimated patches, where the image is printed onto fabric and every subtle shade survives.
Push the same photo into embroidery and it struggles. Thread cannot reproduce a gradient or a human face — the machine sews large shapes and flat colours, not soft blends.
I saw this first-hand with a local coffee-shop logo. Woven, it came out crisp and sharp. Embroidered, the fine steam lines above the cup turned to mush. Sublimated, it looked perfect — full detail, every shade intact.
Same file. Three patch types. Three very different results. The artwork never changed — only the process did.
Using a Drawing or Sketch
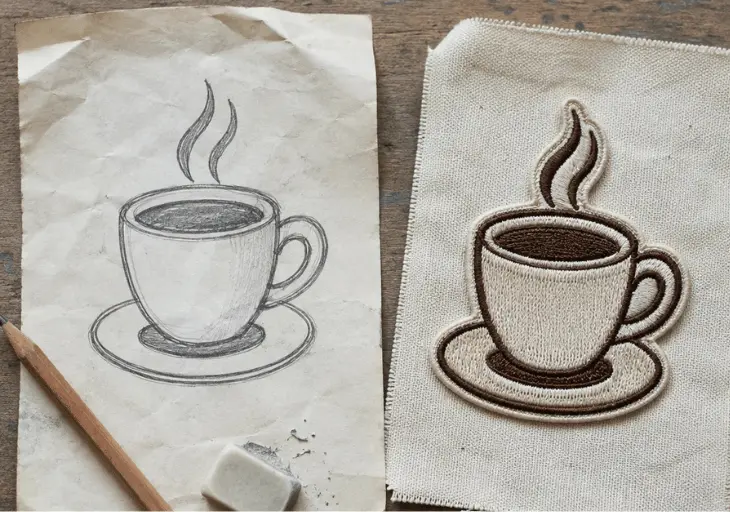
A drawing is a blueprint, not the finished stitch file.
So turning a sketch into a patch starts by redrawing it into clean lines.
Simple, bold line art converts beautifully. Hand sketches usually need redrawing first, as pencil lines are too thin and uneven for a machine to trace.
Insider Secret: The 3mm Rule.
Fine detail and text under roughly 3mm gets swallowed in stitching. The needle cannot place enough stitches to keep small shapes open, so they close into a dark blob. When a customer insists on tiny text, we run a sample — it settles it faster than any explanation.
Once you have chosen the right artwork type, the next step is making sure it is in a file your patch maker can actually use.
Vector vs. Raster: Why It Matters
Understanding vector vs raster for patches is the biggest thing separating a clean patch from a soft, fuzzy one.
Vector Files (AI, EPS, PDF, SVG)
Built from math, not pixels. Scales to any size without losing a crisp edge — ideal for logos and embroidery.
Raster Files (JPG, PNG)
Built from pixels. Fine for sublimation if the resolution is high — at least 300 DPI at the final patch size.
| Vector (AI, EPS, PDF, SVG) | Raster (JPG, PNG) | |
|---|---|---|
| Made of | Math / paths | Pixels |
| Scales cleanly? | Yes, at any size | No — blurs when enlarged |
| Best for | Embroidered & woven patches, logos | Sublimated / photo patches |
| Colour handling | Limited by thread count | Unlimited on sublimation |
| Editable later? | Yes | Hard to edit cleanly |
For the full breakdown, see our guide on Vector vs Raster Requirements.
File Formats & Resolution
The right file can save you hours of back-and-forth and make sure the patch turns out exactly as you pictured.
These are the acceptable file formats for patches, from best to workable:
- Vector, always first choice: AI, EPS, SVG, or PDF.
- Raster, only if high quality: PNG or JPG at 300 DPI or higher.
Send the original design file, not a screenshot or a social media image. Those are compressed and low-resolution, which forces guesswork on every edge.
The minimum resolution for patch printing is 300 DPI at the finished size — not at the size it happens to open on your screen.
Pro Tip: The "Zoom to 400%" Test.
Before you send any logo, open it and zoom in to 400%. If the edges turn blocky and fuzzy, it is a low-resolution raster file, and your embroidery will look soft. Clean vector lines stay razor-sharp at any zoom. This 10-second check catches most of the reorders we see.
Factory Tip: Use a Transparent Background.
Whenever possible, send a PNG with a transparent background. It removes the white box around your logo and makes the artwork far easier to place, trace, and border cleanly.
Getting Your Artwork Ready
Artwork not ready? Do not panic. Blurry logos, photos, and hand sketches can nearly always be cleaned up before production. Two processes do this, and people mix them up constantly.
What Vectorizing Is
Vectorizing redraws a pixel-based image into clean, editable vector lines. It rescues a low-resolution logo and makes it sharp and scalable again.
You can read more in our walkthrough, Convert Your Photo to Vector Art.
What Digitizing Is
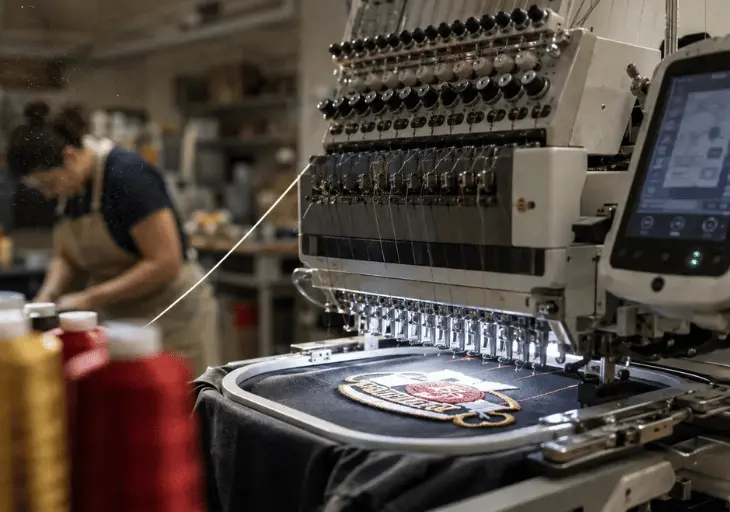
Digitizing converts your artwork into stitch instructions — where to place every stitch, which colour, and which direction to run. It is the step that turns a picture into a thread design.
We break the whole thing down in The Digitizing Process Explained.
A photo patch is a special case. Instead of stitching pixel by pixel, the photo is either printed onto patch cloth for full realism, or embroidered in a simplified form where only large shapes and colours are sewn.
How Patch Size Affects Your Design
Size changes what your artwork can hold.
Smaller patches need simpler designs, larger text, and fewer fine details — there is less room for the needle to work.
Embroidery uses thread, not ink. So gradients, hairline lines, and tiny elements often have to be removed or enlarged. That is not cutting corners — it is the only way the design survives in thread.
Plan your border early, too. It sets the patch shape, protects the edge, and keeps important artwork clear of the rim. And wherever possible we match colours to Pantone references, so your thread, yarn, ink, and PVC stay consistent batch to batch.
Insider Secret: Merrowed vs. Hot-Cut Edges.
The edge type quietly limits your shape. A merrowed (overlocked) border suits simple rounded shapes and needs about 3mm of clearance. Complex or spiky outlines need a hot-cut or laser-cut edge, which follows sharp detail the overlock machine cannot. Decide the edge before you finalise the artwork, not after.
Best File by Patch Type
This is the table to keep. It answers the real buying question — one file, three outcomes — and shows how many colours each type holds.
Insider tip: you do not need a huge run to test this. We take business orders from just 25 pieces, so you can trial a patch type before committing to volume.
| Patch Type | Best File | Colour Handling |
|---|---|---|
| Embroidered | Vector (AI, EPS, SVG) | Limited by thread count |
| Woven | Vector or high-res raster | More colours than embroidery |
| Sublimated / Photo | High-res raster (300 DPI) | Unlimited, full colour |
| PVC | Vector line art | Limited, flat colours |
Common First-Timer Mistakes
Five slip-ups cause most of the bad samples we see. Each has a quick fix.
- Too many colours. Fix: limit an embroidered patch to a few solid thread colours, or switch to sublimation.
- Tiny detail and text. Fix: enlarge it past 3mm, simplify it, or move it to the border.
- Low-resolution logos. Fix: send the original vector, or have the image vectorized first.
- Gradients on embroidery. Fix: flatten to solid colours, or choose a sublimated patch.
- No clear focal point. Fix: pick one main image, and set the size and placement before adding text.
One more — a mindset: treating a patch as an afterthought. The patches that perform are tied to a brand, team, or campaign, designed with intent.
Quick Artwork Checklist
- Send the original design file, not a screenshot.
- Use the correct format — vector first, high-res raster if not.
- Confirm resolution at the final patch size (see above).
- Simplify tiny details and thin lines.
- Note the finished patch size so text and detail are scaled to fit.
Start With Great Artwork, End With a Great Patch
You can absolutely use a photo or drawing for a custom patch.
The trick is matching it to the right patch type and sending a clean file.
Get the artwork right and everything downstream gets easier. Get it wrong and no thread, ink, or fabric will save the patch.
Not sure your artwork will work?
Send it over for a free artwork review. We will check the file, tell you honestly which patch type suits it, flag anything that needs simplifying — and get back to you within one business day, before you spend a penny on production. Business orders start from just 25 pieces.